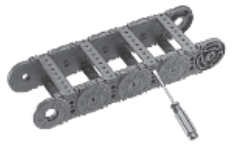
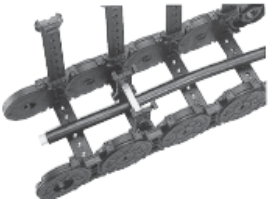
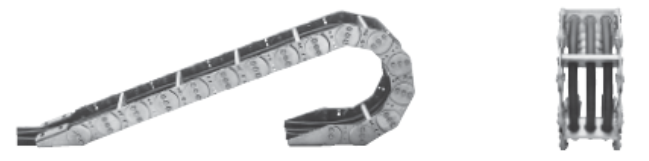
技術資料 ケーブルベヤ - ケーブルベヤの連結・組立
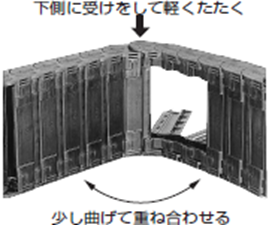
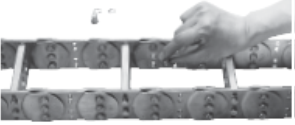
TKP形
連結

アームを外し方向をそろえる。

ピンと穴を合わせ押し込む。
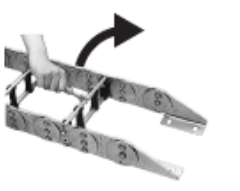
ケーブル・ホースの取付

ケーブル・ホースをセットした後でアームを閉じる。
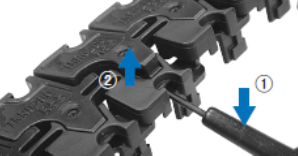
切離し

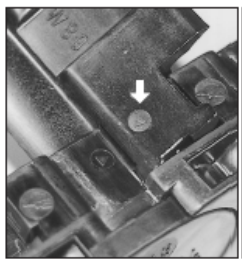
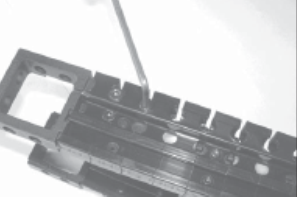
マイナスドライバを差込み、ドライバを90°回転、あるいは起こして抉る。
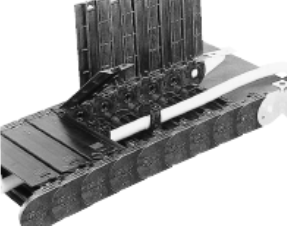
TKP62H42, TKP90H50, TKP125H74
連結

連結部のアームとロックステイを3~4個外す。

リンクを連結した後でロックステイを取付ける。

ケーブル・ホースをセットした後でアームを閉じる。
TKP形の連結・組立は構造により異なります。必ずそれぞれの取扱説明書を参照ください。
TKC形
連結

連結部のアームとロックステイを3~4個外す。
リンクを連結した後でロックステイを取付ける。
ケーブル・ホースをセットした後でアームを閉じる。
※ロックステイの取外し案内マーク(ドライバ・マーク)
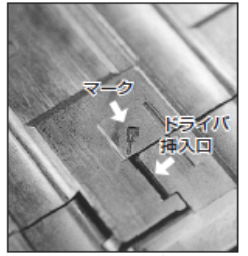
TKC34H25の場合
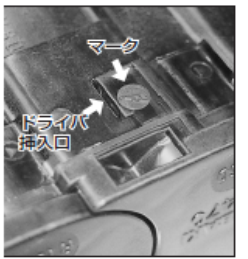
TKC47H36・TKC64H50・TKC85H68の場合
※ロックステイの取付案内マーク(リンクとの合わせマーク)

TKC34H25の場合
TKC47H36・TKC64H50・TKC85H68の場合
TKMK47H28
連結

連結部の向きをそろえる。
連結部を上図のように重ね、連結部を強く押さえる。
「パチン」と音がしたら連結完了。
分解

アーム・ロックステイを外し、一方を押さえながら他方をねじるようにしてリンクを切り離します。
TKMK65H42, TKMK95H58, TKMK125H72
連結
連結部の向きをそろえる。

連結部を図のように重ね合わせ連結部中心穴にロッキングボルトを入れる。
ロッキングボルトを時計方向に「カチッ」と音がするまで回転させる。(確認はボルト端面の矢印がケーブルベヤ長手方向に対して垂直になること)
分解
組立時と逆の要領です。
- 1.ロッキンボルトを反時計回りに回す。
- 2.リンクとリンクを切り離す。
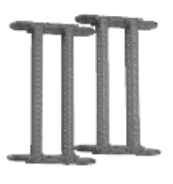
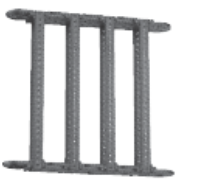
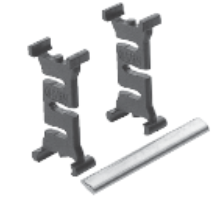
TKMK形・TKMT形多段仕切板の組立
連結

縦仕切板は側面の数字側がケーブルベヤの外周側です。
TKMK47H28, TKMT47H26
TKMK65H42, TKMK95H58, TKMK125H72, TKMT65H38, TKMT95H54, TKMT125H68
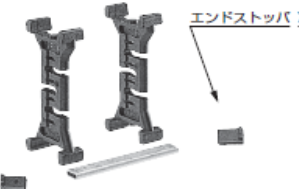
横仕切板(端面が波状側)を縦仕切板のスリットへ差込む。(奥まで確実に入れること)
※DSB形の場合横仕切板の両端に外れ防止のエンドストッパを取付ける。
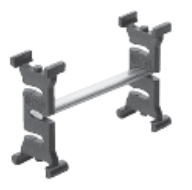
縦仕切板の間隔を所定の長さに合わせて組立完了です。
アームをマイナスドライバで開ける。
多段仕切板をセットする。
【多段仕切のセット】
- 1.多段仕切をするケーブル・ホースのうち、内周側に入れるケーブル・ホースをセットする。
- 2.多段仕切板(組立済)をそのケーブル・ホースの 上からセットする。
- 3.外周側にセットするケーブルホースを横仕切板の上にセットする。
- 4.アームを閉じる。
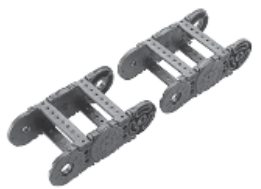
TKR15H22
連結(ブラケットの取付方法も同様の手順です)
アーム、内リンクを外します。
※延長する側のブラケットから外リンク同士の連結部までと、さらに2個を外します。

外リンク同士の連結部で外リンク間を分割します。
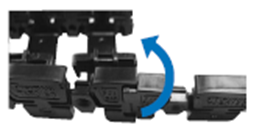
延長用の外リンクを連結します。
内リンクを外リンクに取付けます。
※外リンクのフックを内リンクのスキマに差し込みます。
(外周側→内周側の順)
片側の外リンクに全ての内リンクを取付け、その後反対側の外リンクに内リンクを取付けます。

所定のリンク数になるように外リンクを切断します。
外リンクの切断部にブラケットを取付けます。
本体部、ブラケットにアームを取付けます。
TKR20H28, TKR26H40, TKR28H52
連結(ブラケットの取付方法も同様の手順です)

所定のリンク数になるように外リンクを切断します。


外リンクの切断部にブラケットを取付けます。
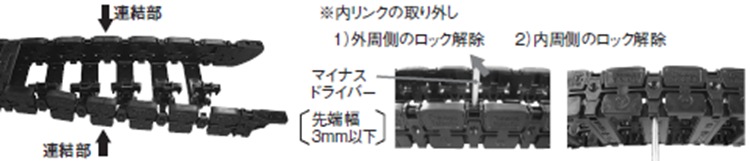
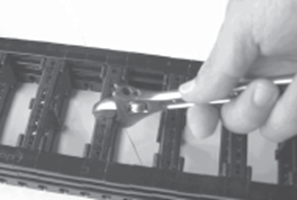
分割
- 1.リンク内周面の穴にマイナスドライバー(先端幅:3.5mm以下) 矢印の方向に抉ます。
- 2.リンク間のロックが解除されリンクが外れます。
TKQ形
ケーブル・ホースの挿入(セット)
アームを外します。
アームはモンキーレンチなどではさんでひねると簡単に取外しできます。
仕切板の取付け
仕切板はTKMK形・TKMT形の仕切板取付を参照ください。
ケーブルホースを所定の位置に挿入します。
アームを閉じます。
アーム上面をプラハンマーで軽くたたいてアームを閉じます。
全長を短縮する場合(※延長はできません)
固定端側
・固定端金具を外します。
・サイドバンドを切断します。
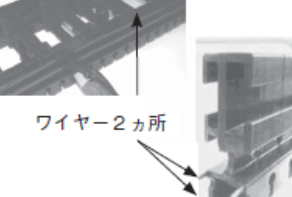
サイドバンドは片側2ヶ所ずつあります。大形のニッパーでワイヤー部分を切断ください。ワイヤーカット後、屈曲方向の逆方向に曲げると切断できます。切断個所にエンドピースがある場合は、エンドピースを取外してください。

・切断部を面取りします。
切断部をニッパーなどで面取りします面取りが十分でないと金具が入らないおそれがあります。

ワイヤーの先端で手を刺さないようご注意ください。
・エンドピースを外します。
移動端から3リンク目までにエンドピースがある場合は金具が入らないのでエンドピースを外します。エンドピースは星形穴付タッピングボルトで組込まれていますので専用ドライバーが必要です。
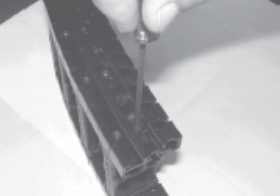
・金具を連結します。
金具をサイドバンドに押込み六角レンチでボルトを取付けます。金具が表裏逆にならぬようご注意ください。
移動端側
移動端から5リンク目以上にアームがある場合は強度的に弱くなるので避けてください。短縮方法は固定端を短縮する場合に準じます。
TK形・TKH形・TKS形
リンクの連結

外周側を下にしてください。

ピン穴を合わせる。
ピンを挿入し止め輪をとめる。
注)
ケーブルベヤにはふくらみが付けてありますので、外周側を床面に添わせた時は両端が浮上ります。この場合、両端に枕木を敷いてピン穴を合わせてください。
ケーブル・ホースの取付け
TK形・TKH形(分割形サポータの場合)

- ・内周側サポータを取外します。(サポータの取外し、および取付けが困難な時は、他方のボルトを一旦緩めると容易です。)
- ・ケーブル・ホースを所定のサポータの半穴の上に乗せます。
- ・内周側サポータを取付けて仮止めします。取外したサポータの一片は、必ず元の同じ位置(同一符号同士の組合せ)に取付けてください。
- ※一体形サポータの場合は、ケーブルベヤの一端よりサポータ穴にケーブル・ホースを挿入します。
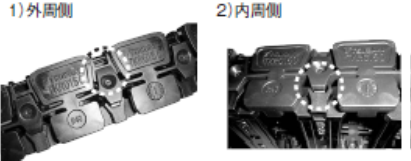
- ※サポータは外周側にマークを刻印しています。
TKS形の場合
内周側のバーは90°回転させると取外せます。
調整および締付
2条のリンク間でのねじれが生じないように注意してください。
水平でない状態でケーブル・ホースの組込みなどを行うと、据付時にケーブルベヤがねじれたり、蛇行を生じ危険です。
